Pretty Lil' Pumpkins
- Lori Saenz
- Oct 26, 2017
- 3 min read

Like most of us in life, pumpkins come in a variety of shapes, sizes, and colors. There are over 43 different types of pumpkins including Cinderella pumpkins, BabyBoo pumpkins, and Goosebump pumpkins, just to name a few! I am going to add 1 more to the list: Sweater Pumpkins! You are not going to find these out on the farm...and more than likely you have everything you need already in your home, so let's go pumpkin pickin'...
SWEATER PUMPKIN
Step 1: Gather your supplies. Any cloth, towel, sweater, or even pajama pants will work. I have used this chunky-fuzzy white material a couple times- it is my favorite. You will also need some yarn and a 'darning' needle...A darning needle is a fancy name for a longer, thicker needle. You will also need some stuffing, a spindle or stick, and some acorns, pine cones, etc.

Step 2: Cut a circle in your material 16" in diameter (any size works, but for my fuzzy white pumpkin, these are the dimensions).

Step 3: With your yarn & needle, run a long gathering stitch all along the outside rim of your circle.

Step 4: Pull both ends together to form a little pocket-like ball. Pour some rice in the bottom for a little weight, then add your stuffing/fiber fill. TIP: Sprinkle some cinnamon and/or allspice in with your rice to sweeten your pumpkin's aroma😊

Step 5: Once you are happy with your pumpkin's fullness - remember no one likes a skinny pumpkin - pull your strings tight and tie in a knot, leaving enough room to add a stem later.

Step 6: Thread your needle once again with a complimentary yarn color approximately 30". Tie one end in a knot. Pull your needle through the opening in the top center and back out of the bottom. Pull the needle back up to the top (along the outside of your pumpkin), pulling the string tight. Repeat this pattern 5 more times creating 6 'wedges'. Almost like 6 pieces of pumpkin pie! Tie your yarn off into a knot.

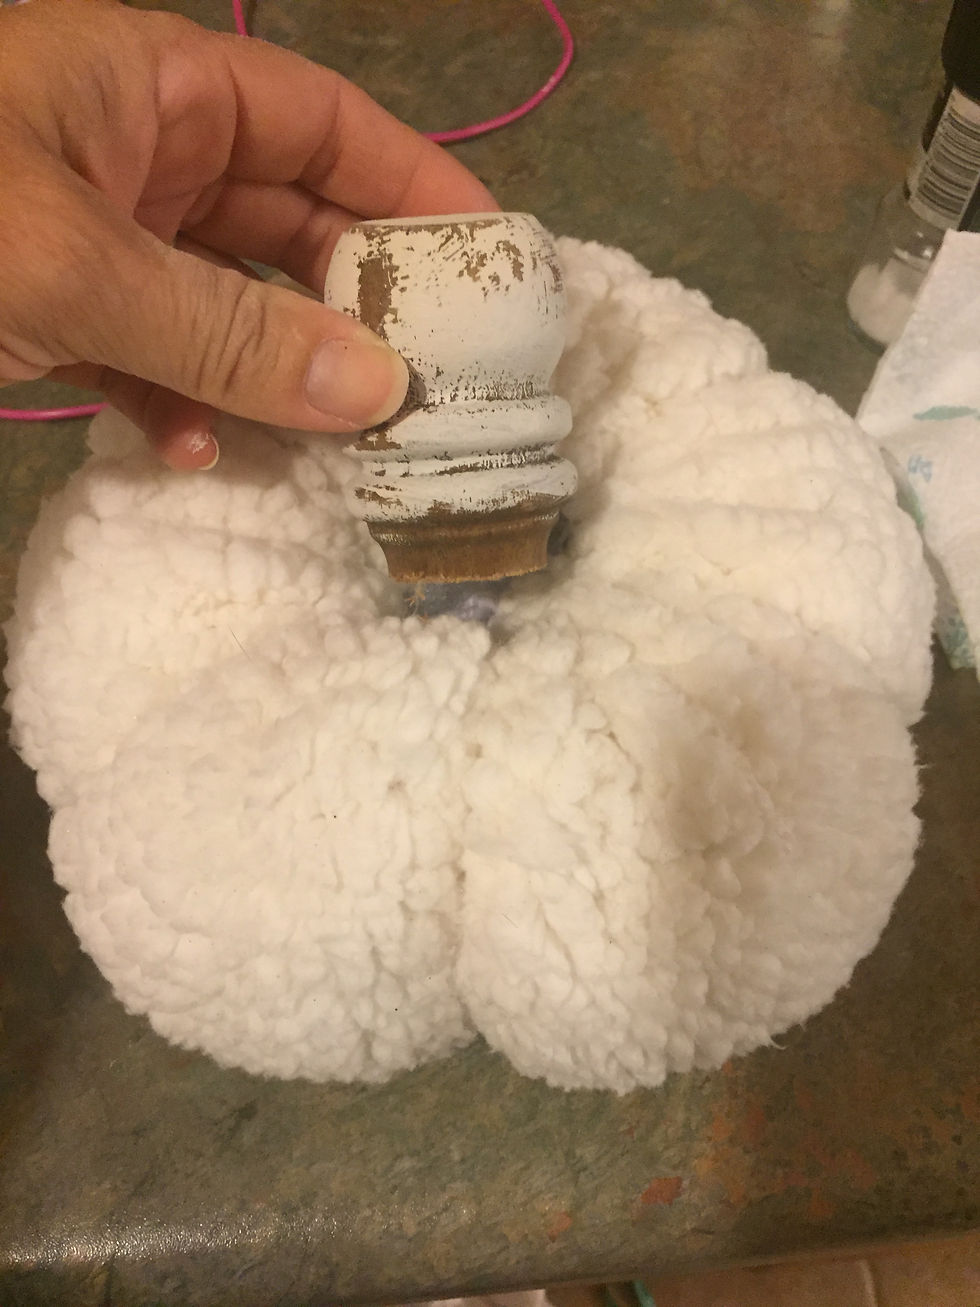
Step 7: Create your pumpkin stem out of sticks/branches, cinnamon sticks, or my favorite-a cut up chair spindle that has been painted and distressed. Hot glue this stem down into the center of your pumpkin. Add all the extra goodies like a twine bow, felt leaves, mini pinecones, acorns etc. Hot glue these all in place and you have yourself a Sweater Pumpkin!

A special shout out goes to my fellow crafter Miss Kim over at Alamo Craft Company. She does monthly craft diy sessions. I couldn't make it to her pumpkin making class, and she was sweet enough to give me my own private tutorial on how to 'build a pumpkin'. Basically todays themed blog is thanks to her! And there is no reason to only enjoy your pumpkins during the fall...I foresee Christmas pumpkins, Easter pumpkins and maybe even 4th of July pumpkins in my future!

Hope you enjoy the following Pumpkin slide show.......
I can never say thank you too many times for all of your support, 'likes', 'shares', 'subscribes', etc during this blog journey of mine! My oldest son is getting married in mid-December, so along with all the other holiday craziness, my blogging plans are to post once in November and once again in December, and then to hopefully resume more often in January.
Please feel free to follow me on Facebook and Instagram where I regularly post 4-5 times a week. And if you desperately need a chunky sweater pumpkin, and absolutely do not want to make one yourself, just click on the chat button and I will make sure you get one!
Happy Pumpkin Day!!!
Lori


Comments