

Cheese Box Redo
- Lori Saenz
- Jul 1, 2017
- 3 min read

Swiss, Havarti, Muenster, Cheddar ..... who cares, I just want that beautiful old cheese box! The first one I came across was at a local flea market and it was 'the lid' only. Didn't know what to do with it at first, which is the norm for me. I usually have to sit on things and think about them for awhile before inspiration hits. Which is why I have an extra room full of pre-inspired items! Back to my cheese box. This treasure came from our visit with Mike in Louisiana to the Bonnie & Clyde Trade Days, and became 2 separate projects!
Project #1
Cheese Box Hanging Shelf
Begin by staining your box. I chose "Espresso" by Minwax. This is my favorite stain when I make ladders, but not so much here. It was way too dark so I decided to add a 2nd stain of 'Vintage Aqua' by Varathane on top of the espresso, and that gave it the look I was going for.
Next I added a shelf. I used an old plank I had on hand, and cut it down to the size I needed.
Using my Oops paint from Home Depot, I dry brushed the shelf. Dry Brushing is as simple as dipping your brush in paint and brushing most of it off onto some paper, then painting your product with the remainder...gives it a light, airy effect
The plank was a tight fit, which is perfect, and I just wedged it into the cheese box and added a strip of hot glue underneath.
Lastly, I got an old belt from my closet and glued it onto both sides, making sure to leave plenty of extra belt on top for a loop for hanging.
TA DA! You have yourself a Cheese Box Hanging Shelf!

Project #2
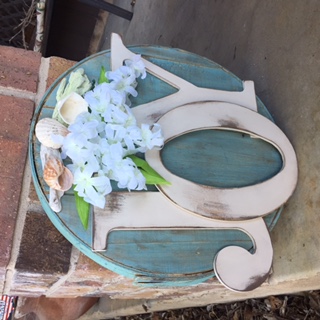
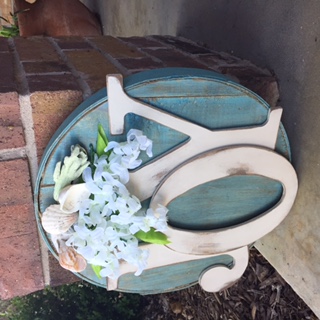
JOY Cheese Box Lid
Start the same way by staining your lid. This time I began with the 'Vintage Aqua' stain and then added little 'smears' of espresso stain on top for an aged effect.
I purchased the 'JOY' letters at Hobby Lobby at 40% off. Then I painted them with the same Oops paint I used on the shelf above. After the letters dried, I sanded down the edges and a few other random spots.

Here's one way I get an antiqued finish. Using 'Espresso' stain, take a q-tip and dip it in the stain. Working in small sections, run the dipped q-tip along your distressed areas. Now squeeze some baby oil on a cotton ball and immediately rub that over your newly stained areas. Continue this process on all distressed areas of the letters. You'll see the magic happen immediately. Wipe off excess oil after approx 10 minutes.
Hot glue your letters down placing the 'O' on the top edges of the 'J' and the 'Y', giving it a 3D effect.
Glue down a combo of flowers, shells, and driftwood above your letters in any pattern that brings you JOY!
And that's it. Always, Always find your Joy, then do what brings you Joy!
Joy comes in many different shapes and sizes. If you love these projects, but not ready to make them, they are available for sale over in my booths at Alamo Craft Company, 6151 NW Loop 410, San Antonio, TX, 78238. I also do special orders, just drop me an email at lorisaenz@sbcglobal.net


Next Weeks DIY Project
Tune in Thursday to see what I do with this old, plain, simple, loveless stool....


Comments